Showing posts with label tag. Show all posts

Wednesday, January 19, 2022

Nature Tag with Scrapbook Adhesives by 3L~

Hi guys!
Today on Scrapbook Adhesives by 3L Blog I'm sharing
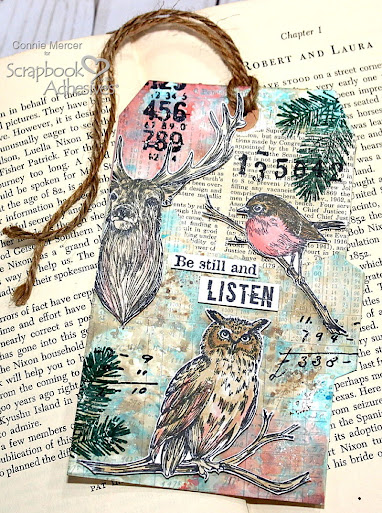
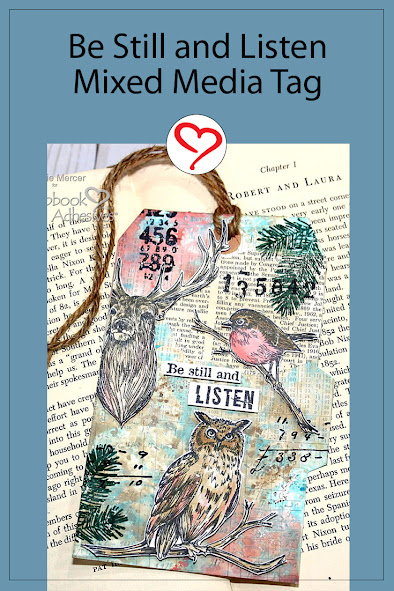
a mixed media Nature Tag.  The 3D Foam Squares Micro White
were perfect for the branches and horns, to adhere them
to the tag.  This is a stamped tag with lots of color!

As always I have all the details over on the Scrapbook Adhesives
by 3L Blog. 
I hope you will take a look.  I used stencils, stamps, 
vintage dictionary paper, ink and awesome adhesive!!!


Thanks for stopping by.
Connie Mercer/DT Member

Creative Time: 45 minutes
Skill Level: Intermediate

Materials needed:
Scrapbook Adhesives by 3L®
3D Foam Strips
3D Foam Squares White Mix
3D Foam Squares Micro White

Home Hobby by 3L®
Duel Tip Glue Pen

other: stamps: Katzelkraft, Darkroom Door, Ink: Archival ink, Archival Distress, jute, a tag, vintage dictionary paper and circle reinforcers.

Pin It!!!

Tuesday, June 29, 2021

Mixed Media Tag for Topflight Stamps~

Hi guys!
It is my turn on the Topflight Stamps Blog. I have a #10
manila tag all messy (in a cool way) up with some awesome
products by PaperArtsy and friends :):)


This was really fun to create!! I'm using the newly released 
stamp set by Sara Naumann (ESN52) and the PS248 stencil works
great with the stamps.


I have all the details over on the Topflight Stamps Blog. I hope
you will check out Sara Naumann. You won't be 
disappointed.  Good Stuff!!!!

Products used:


Thanks for stopping by
 and 
just for you
get 12% off by using the code
conniemercer at the Topflight Stamps Store.
Connie

Thursday, June 3, 2021

Mixed Media style Flag Tag with Scrapbook Adhesives by 3L

 Hi guys!
It is my turn on the Scrapbook Adhesives by 3L Blog today.  I'll be 
sharing a Patriotic Flag Tag using the new E-Z Runner Stars
Refillable Dispenser.
  I hear they have hearts too!!! Very cool and
clever product.


I'll also be creating with some of my favorite stamps along with more cool
3D Foam adhesive.  I have all the details over on the SAby3L blog. I hope
you will take a look.


Thanks for stopping by!
Connie Mercer

Creative Time: 60 minutes
Skill Level: intermediate

Materials Needed
Scrapbook Adhesives by 3L®
E-Z Runner Stars Refillable Dispenser
3D Foam Circle Frames Black
3D Foam Micro Squares White
3D Foam Strips
3D Foam Circle White mix
other: Blue Knight Rubber Stamps (Statue of liberty), Darkroom Door (mixed media stamps), Tim Holtz/idea-ology/small talk stickers, Versafine ink, Ranger/Archival ink, Ranger/Distress Oxide ink, Ranger/inkssentials #10 manila tag and Ranger/Perfect Pearls
.

Pin It!

Tuesday, August 20, 2019

Jumbo Tag by Clear Scraps ~it's true !!


Hi guys!!
Clear Scraps designed a JUMBO wood tag and it is so cool!!!
  Clear Scraps to decorate the tag.
Let me show you~

 I know you have tons of ideas going through your head. right?
This is basically painted with random Ivy branches and a stenciled checked
border.  Easy and so cute!!!

To finish the look, paint splats were added.

Thanks for stopping by~


Wednesday, May 9, 2018

Treasures From The Sea Tag with Clear Scraps~

Hi, Connie here with a chipboard sea shell tag using the new Fan-Shells chipboard embellishments by Clear Scraps.  The chipboard pieces can be inked, painted and embossed, to add color to the chipboard.  These are embossed.

Clear Scraps_tag1_sea shell_c.mercer
The tag is a chipboard tag by Clear Scraps and covered with pattern paper.   The sea shells were inked with Distress Oxide and embossed with clear gloss embossing powder.  Very easy and the look, the embossing technique gives the shells, makes them appear to have been plucked off the beach.  Love the look!!!

Clear Scraps_tag2_sea shell_c.mercer
The Distress Oxide inks give the chipboard a light and dark effect, once the chipboard is embossed.  Twine was added and then a couple of real sea shells to the center of the bow.  Text stickers were added also.  Tags are great for gift bags or to tie around a treat.  These are from the new release in January!

Supplies used:
Clear Scraps: chipboard tag and chipboard Fan-shells embellishment
Beacon
other: pattern paper, stickers, twine and small sea shells

Thanks for stopping by~
Connie Mercer/DT Member

Wednesday, July 26, 2017

July Tag with Clear Scraps~

Hi, Connie here with my July tag with Clear Scraps.   I used a couple of the chipboard embellishments, along with an acrylic tag, to create a festive 4th of July tag.

Clear scraps_july tag_chipboard_c.mercer
Remove the plastic film from both sides of the acrylic tag before creating your project.  Adhere pattern paper to the back of the tag using Zip Dry by Beacon.  Layer pattern paper, journal cards and stickers on the front of the tag (directly on the acrylic) and adhere with Zip Dry or use dimensional adhesive.  Shade around the tag with ink.  Add ribbon or twine to the top.  Finish embellishing with buttons and rhinestones.

Clear scraps_july tag_chipboard2_c.mercer

Last step, paint the chipboard pieces (the star and the 4th of July word piece) using acrylic paint. Red for the word embellishment and yellow for the star. Let dry and adhere to the front of the tag.  Use Wink of Stella/clear to add sparkle to the star and word embellishment.  The tag is ready to tape to a big watermelon and enjoy!!

Products used:
Clear Scraps: chipboard word (4th of July)
Clear Scraps: chipboard stars
Clear Scraps: Acrylic tag
Other:
Zip Dry by Beacon
Paper: Authentique
Buttons Galore and More
Wink of Stella/clear
trim
divine Twine
rhinestones

Thanks for stopping by~
Connie Mercer/DT Member

Thursday, June 29, 2017

June tag with Clear Scraps!

Hi, Connie here with my June tag using acrylic and a bunch of cute embellishments by Clear Scraps.  The embellishments are made using stencils by Clear Scraps. So easy!! Just stencil on white cardstock and trim out. Add dimensional adhesive to pop them up and super cute!!!

Acrylic tag_clear scraps_june tag_c. mercer
The background is created using  the 6" Anchor and Helm stencil with StazOn ink.  The acrylic tag was sanded first, giving a frosted look and then stenciled.  The Helm chipboard piece is by Clear Scraps.   Added color to the chipboard using StazOn ink.

June tag_Clear Scraps_chipborad_c.mercer

Products used:
Clear Scraps: Acrylic tag
Clear Scraps: 6" Ocean Friends, 6" Beach Fun and 6" Anchor and Helm stencil.
Clear Scraps: Chipboard embellishment: Helm/Anchor.
other:
StazOn ink, Lawn Fawn stamps, Beacon Quick Grip, trim, pearls and netting.

Thank for stopping by~
Connie Mercer/DT Member

Thursday, April 20, 2017

April Chipboard tag with Clear Scraps!

Hi, Connie here with my April tag, using the chipboard tag, by Clear Scraps.  The tag background is created using pattern paper and stencils from Clear Scraps. 

Clear scraps_april tag_c.mercer

Instructions:
Clear scraps_april tag_chipboard_c.mercer


  • Select one sheet of pattern paper. Trace the tag on the paper and cut it out.

  • Glue to the chipboard tag and sand the edges with a file.

  • Select a couple of stencils and add the patterns to the front of the tag. Place them in random spots using StazOn ink.

  • Layer paper pieces to the front and adhere down.  Add dimensional adhesive for the butterflies.  

  • Add twine to the top of the tag.


  • Clear scraps_april tag_stencil_c.mercer

    Supplies used:
    Clear Scraps: chipboard tag, 6" Chevron stencil, 6" Quaterfoil stencil
    Other:
    StazOn ink, Beacon 3-IN-1, S.e.i., stickers, rhinestones, buttons, flowers.

    Thanks for stopping by~
    Connie Mercer/DT Member

    Thursday, March 30, 2017

    March tag with Clear Scraps!

    Hi, Connie here with my March Tag tutorial using an acrylic tag by Clear Scraps and one of the new chipboard embellishments!  Using one of the chipboard bird houses it was fun to create a tag with family in mind.  Let me show you~
    Clear scraps_acrylic_tag_c.mercer

    Instructions:
    Clear scraps_acrylic_tag_tutorail_c.mercer
    1. Trim the overlay paper to the size of the acrylic tag.
    2. Trim out the blue cardstock to the size of the tag.  Lay the tag on the cardstock and trace around the tag and cut it out.
    3. Adhere the blue cardstock to the back of the acrylic tag.  Then adhere the green overlay paper to the front of the acrylic tag.
    4. When it is dry use a hole punch, to create the opening, for the twine to be tied at the top of the tag.
    Clear scraps_acrylic_paint_c. mercer

      5. Paint or use ink to add color to the bird house.
      6. Adhere to the front of the tag.
      7. Paint the word Family with dark blue acrylic paint. Let dry. Adhere to bottom of the tag.
      8. Splat white and black paint over the front of the tag .
      9. Add felt leaves, flowers and buttons.
      10. Add sentiment and tie the twine in the punched out hole at the top of the tag.

    Clear scraps_acrylic_chipboard_c.mercer

    Supply list:
    Clear Scraps: Acrylic tag, Chipboard Bird Houses, Chipboard Word (Family)
    Beacon 3-IN-1
    other:
    acrylic paint, sticker, felt leaves, buttons, flowers and twine.

    Thanks for stopping by~
    Connie Mercer/DT Member

    Friday, March 17, 2017

    Flour De Shaker by Clear Scraps.

    Hi, Connie here with a gift idea using the Flour De Shaker by Clear Scraps.   Using an extra large tag and the Flour De Shaker, a super cute tag/card was made and even doubled as a gift.  Let me show you what I mean~

    Clear scraps_Flour de shaker_gift card_c.mercer
    This is the front of the tag,  decorated with pattern paper and stickers.  To make the fold in the tag, find the center of the tag and score two lines , one on each side of the center guide. About a 1/2" space will work great for the shaker to have space. The background is acrylic paint splatted on with an old toothbrush. My favorite way to add color randomly to a background card or tag.  Here is a few step out photos of how the Flour De Shaker by Clear Scraps came together.

    Clear scraps_Flour De Shaker_sequins_c.mercer
    Trace the shape of the Flour De on pattern paper and cut it out.  Small nail scissors work great for this.  Use Beacon 3-1 to adhere the pattern paper to the back  shaker chipboard piece. Add sequins to the inside, of the shaker, and glue on the frame and acrylic piece.  Remember to remove the plastic from the Flour De  shape.  Use a small paint brush and paint the front frame with acrylic beige paint.  The sides  were also painted .  When the paint is good and dry, the Flour De Shaker is ready to be adhered to the inside of the tag.

    March7
    An inside look before the gift was added ~

    Clear scraps_shaker_large tag_c. mercer
    The money was rolled up and stuck in under the twine.

    Products used:
    Clear Scraps Flour De Shaker
    other: pattern paper, twine, embellishments, extra large black tag, acrylic paint, stickers, Beacon 3-1 adhesive.

    Thanks for stopping by~
    Connie Mercer/DT Member

    Wednesday, March 1, 2017

    February tag with Clear Scraps!

    Hi, Connie here with my February tag using a couple of the new releases by Clear Scraps.  I used the Hearts/Dots Layering stencil with the Rose chipboard embellishment to create the tag.

    Heart overlay stencil_c.mercer
    I created a collage of pictures to show how the tag was created.

    Heart overlay_rose chipboard_c.mercer
    *Gesso the chipboard tag.  let dry.
    *Create a background on the tag.  I used the Gelli plate and acrylic paint.  Let dry.
    *Add hearts with the Hearts/Dots layering stencil by Clear Scraps.
    *Paint the Rose chipboard embellishment and let it dry.
    *Add the Rose chipboard to the tag and finish decorating to your liking.

    Products used:
    Chipboard tag by Clear Scraps
    Layering  Heart/Dots stencil by Clear Scraps
    Chipboard Rose embellishment by Clear Scraps

    Other:
    Gesso, acrylic paint, Gelli Plate, twine and stickers.

    Thanks for stopping by~
    Connie Mercer/DT Member

    Friday, January 27, 2017

    Paisley Layer Stencil ~ Clear Scraps!

    Hi, Connie here with a tag using the new Paisley Stencil that has layers.  You can go crazy adding the layers while having tons of fun.

    Paisley overlay_c.mercer

    I created a step out of how the tag was created.

    Jan tag

    I started with StazOn inks,  picked colors that looked good together.
    I used a chipboard tag by Clear Scraps and applied Gesso to it.  Let it dry.
    I applied the ink with a makeup sponge.   Start with the open images.
    After you have your images stenciled on the chipboard tag, in random places, add the line work over the images.
    To add color to the chipboard word "create" ~ use the StazOn ink with the same applicator.
    Easy and fun!!!

    Clear Scraps products used:
    Chipboard tag
    Chipboard word/Create
    Paisley/layer stencil

    Thanks for stopping by~
    Connie Mercer/DT Member

    Monday, December 26, 2016

    Christmas Tag with Clear Scraps~

    Hi, Connie here with my December Tag tutorial using an acrylic tag by Clear Scraps and some fancy Christmas paper.   This is a cute and easy tag that will make your Christmas package look so very special!
    Dec2

    Supplies used:
    Clear Scraps / Acrylic tags,  acrylic lamp embellishment.
    Other: pattern paper, stickers, rhinestones, ribbon,  ink spray for snow, Beacon and StazOn black ink.

    Instructions:
    Dec3

  • Apply StazOn black ink to acrylic lamp post shape.

  • Trace acrylic tag shape on pattern paper and cut out.

  • Adhere acrylic tag to pattern paper tag with Beacon 1-IN-3.

  • Pop up stickers and apply to front of acrylic tag.

  • Add rhinestones and ribbon.

  • Speckle with white paint for snow effect.
  • Dec1

    Thanks for stopping by~
    Connie Mercer/DT Member

    Friday, December 2, 2016

    Mini Shaker Bell with Clear Scraps!

    Hi, Connie here with a fun and sparkly holiday tag, using the new Mini Shaker Bell, from Clear Scraps!  The Mini Shakers come in six shapes and images.  They would make a super cute ornament set for the holidays.

    Clear scraps_mini shaker bell_c. mercer

    The mini shaker is so easy to assemble and decorate.  What you put inside the shaker is the fun part. Really, it is all up to you  what to fill the inside with.  I used decorative sequins in the Mini Shaker Bell.

    Clear scraps_mini shker_c.mercer

    Supplies used:
    Clear Scraps: Mini Shaker Bell, 12" Doily Stencil and 6" Imagine Stencil
    other:  Sequins, gold embossing powder, Kraft tag, paper doily and  acrylic paint/black, white.

    Thanks for stopping by~
    Connie Mercer/DT Member

    Monday, October 10, 2016

    A Shaker Angel tag with Clear Scraps!

    Hi, Connie here with a great idea for a Holiday gift tag, and an added bonus~ a Christmas ornament. Yes, two functions in one.  I used the new Mini Shaker Angel by Clear Scraps! Beautifully designed  and easy to create with.

    Angel tag1

    I used several stencils to create a background on the large black tag.  Using white acrylic paint, a sponge and the Snowflake border and the 6" Imagine stencil by Clear Scraps the background was created.  The Shaker Angel was created using pattern paper, acrylic paint and sequins (for the inside of the Shaker Angel).  Very simple, just glue the pieces together making a frame, then glue the back on after the shaker has been filled with sequins, as in my example.

    Angel tag2

    These are really fun and Clear Scraps has different Shaker's to choose from.  Great for family crafting night!!

    Thanks for stopping by~ 
    Connie Mercer/DT Member

    Thursday, October 6, 2016

    October tag with Clear Scraps!

    Hi, Connie here with a spooky tag using the new Bats Chipboard Embellishment by Clear Scraps!!  Take a look, but you have been warned, pretty scary!!!  PDF here~

    Bats tag1

    Clear Scraps products used: Chipboard tag, 6” Chevron stencil and chipboard bats.
    Other product used:  paper/DCWV, Beacon adhesive, trim and acrylic paint.

    Oct tag

    Instructions:

  • Cover tag with pattern paper. Adhere with Beacon glue and let dry.

  • When dry sand edges of tag on all sides.

  • Paint the chipboard bats with white acrylic paint and dry.

  • Shade bats with black ink.

  • Using the Chevron Stencil by Clear Scraps apply the design, in random places, on the front of the tag.

  • Speckle the tag with black acrylic paint (the bats, too).

  • Add the word BOO to the bottom of the tag with stickers.

  • Add twine or ribbon to the top of the tag.


  • Thanks for stopping by~
    Connie Mercer/DT Member

    Wednesday, September 28, 2016

    September Tag with Clear Scraps!

    Hi, Connie here to share with my September tag using Clear Scraps products!

    Set tag_clear scraps_c. mercer

    Clear Scraps products used: acrylic tag, 6X6 stencils (Fruit of the Spirit, Diamond, Brick Wall and Chevron) and chipboard feather.
    Other products: Acrylic paint, Gesso, Gel plate, Beacon adhesive, twine and trim.

    Sept2
    Instructions~


  • Remove plastic film from both sides of the acrylic tag.

  • Paint the front of the tag with Gesso and let it dry.

  • Set up your Gel Plate with the acrylic paint colors you want to use. I used four different colors. Using a brayer add color to the front of the tag.

  • When the top of the tag is dry, start using stencils to add dimension and design to the front of the tag.

  • Use the brayer to roll over the feather to add color to it, and then add a few stencil designs. Let dry.

  • Stencil on the word “Kindness”. Outline the letters with black acrylic paint and a small brush.

  • Adhere the feather to the center of the tag, with foam dimensional square adhesive.

  • Add twine and trim.


  • Thanks for stopping by~
    Connie Mercer/DT Member

    Monday, August 29, 2016

    August Tag with Clear Scraps!

    Hi, Connie here to share my August tag with you.  I used an acrylic tag by Clear Scraps and Stazon ink to create tag full of "Joy".

    Aug tag_clear scraps_c. mercer
    Clear Scraps products used: acrylic tag, mini Sunflower  shape, 6X6 stencils (Fruit of the Spirit, Chicken Wire) and 3X12 stencil (He Lives).
    Other products: Faber Castell, Stazon, Beacon, acrylic paint, patterned paper and trim.

    Instructions:

  • Remove plastic film from both sides of the acrylic tag.


  • Using a sponge apply white Stazon ink to the front of the tag. Let dry.
  • Aug3

  • Sponge on the brown Stazon ink for the ground.


  • Sponge on the blue Stazon ink for the sky.


  • Use the He Lives stencil and sponge on the sun with orange Stazon ink.


  • Using black Stazon ink and the chicken wire stencil by Clear Scraps, sponge over the front of the tag. Let dry.


  • Mask off the “Joy” word and stencil it on the bottom of the tag. Highlight the letters with white acrylic paint, using a small brush.


  • Sponge brown Stazon ink to the stem of the flower and green Stazon ink to the leaf.


  • Cover the flower with pattern paper. Adhere with Beacon 3-IN-1.


  • Outline the sun with black acrylic paint using a small brush. Highlight with white acrylic paint in the center of the sun.


  • Add dots, on the sun, with Faber Castell/Texture Gems.


  • Adhere button and trim to tag.   


  • Thanks for stopping by~
    Connie