Showing posts with label post-it-note. Show all posts

Monday, April 27, 2026

One Sheet with Creative Worship Stamps~

Hi there! 
Today I'm sharing my last project as guest designer
for Creative Worship Stamps.  I have called my blog post
One Sheet because that is all I used to create 16 projects.
So let me explain~


Looks hard but it isn't!!
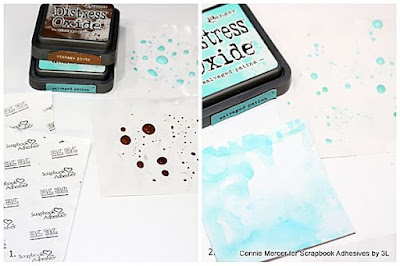
1. Pick out ink.  I used Distress Oxide/ Chipped Sapphire, Stormy Sky,
Bundled Sage, Rustic Wilderness and Peeled Paint.  Add ink (watered
down) to heavy mixed media cardstock. Heat dry after each color.
2. Add in stamps.  Color in line stamps (leaf) for example.
3. Add stencil. Leaf Fronds with Chipped Sapphire Distress 
Oxide ink.
4. Cut into 3"x3" squares.  You have 16 projects waiting to be 
created :)


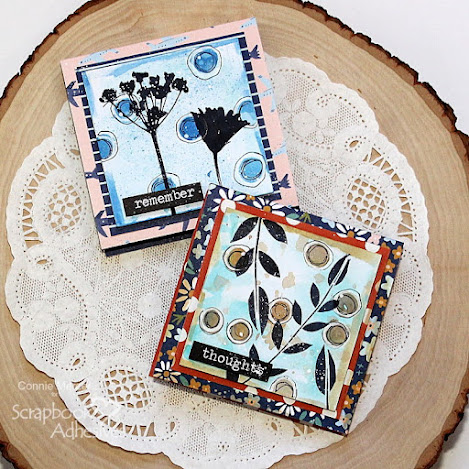
Post-it-Note covers were created using eight of the 3"x3"
squares.  
1. Kraft cardstock cover size 3 1/2"x7 1/4". Score in middle.
2. Color mat size is 3 1/4"x3 1/4". Adhere to front.
3. Add mixed media square to color mat.
4. Add twine, button and sentiment from the Typed Thoughts set.
5. Using the Going Postal set a space is created for "made by".

Will make great gifts!!

The last eight mixed media squares were made into "Thank You"
tags.  I always need these!!!
1. Kraft tag base is 3 1/2"x3 1/2".  Color mat is 3 1/4"x3 1/4".
Adhere mixed media square to color mat.
2. Add top hole with a punch and then add twine.
3. Add buttons and sentiment to all eight tags.
4. Stamp back for "made by" space.


Creative Worship Stamps used : Wonderful Words of Life
Bingo Card, Vintage Ledger Page, Vintage Postcards, Texture
Tiles 1
, Vintage Snippets, Pick a Number and Fantastic
Flowers.

+++++++++++++++++++++++++++++
A BIG Thank You to Creative Worship Stamps
for allowing me to Guest Design for April.
I loved working with your stamps!!!
Connie
crafty_mercer

Tuesday, December 16, 2025

Post-It-Note ideas with Blue Knight Stamps Mixed Media Products~

Hi there!!!
Today I'm sharing some crafty ideas for
Post-It-Holders.  These are great for an office
friend gift or stocking stuffers.  I'm using my
new Mixed Media products by Blue Knight Stamps.


I was pretty excited when I found the craft color Post-It-Notes on
Amazon, so now you know where my inspiration came from.  I didn't
keep track of measurements, I just created.  Once you get one done
then the measurements are worked out. 
1. L top corner ~ I covered a library card holder with the NEW
Mixed Media Designer paper then stamped it with the
Dictionary BG stamp. I added the Mixed Media Numbers, 
BG Branches and the Reverse Sentiment (Just a Note), to the front.
Tied with home spun fabric and added a button.
2. R top corner ~ I created a folder using craft cardstock and scored
in the middle (for the Post-It-Note pad) to sit. The cover is a 2 3/4" square.
I added a scalloped border to the bottom of the Mixed Media Designer
paper
 and stamped with the BG Branches and Reverse Sentiments. Twine 
and a button were added.
3. L bottom ~ This one is really easy!  Just cover a coaster or chipboard
with Mixed Media Designer paper, stamp with the Mixed Media Numbers
set and the Reverse Sentiments.  Add a clip and tie with homespun and
a button to the top of the coaster. 
4. R bottom ~ This one is the same as the folder design (on top).
 Supplies are the same.  I sewed homespun fabric, antique trim
and an antique button, on the cover, for a vintage look. 


Some other examples.  These are really fun to create.
The Mixed Media products by Blue Knight Stamps
make them really cute :):) I packaged them in clear bags
and will share with friends. 
All adhesive is by Scrapbook Adhesives by 3L. 
Thanks for stopping by!
It's not to late to make these. Super fun!!
Connie


Wednesday, May 3, 2023

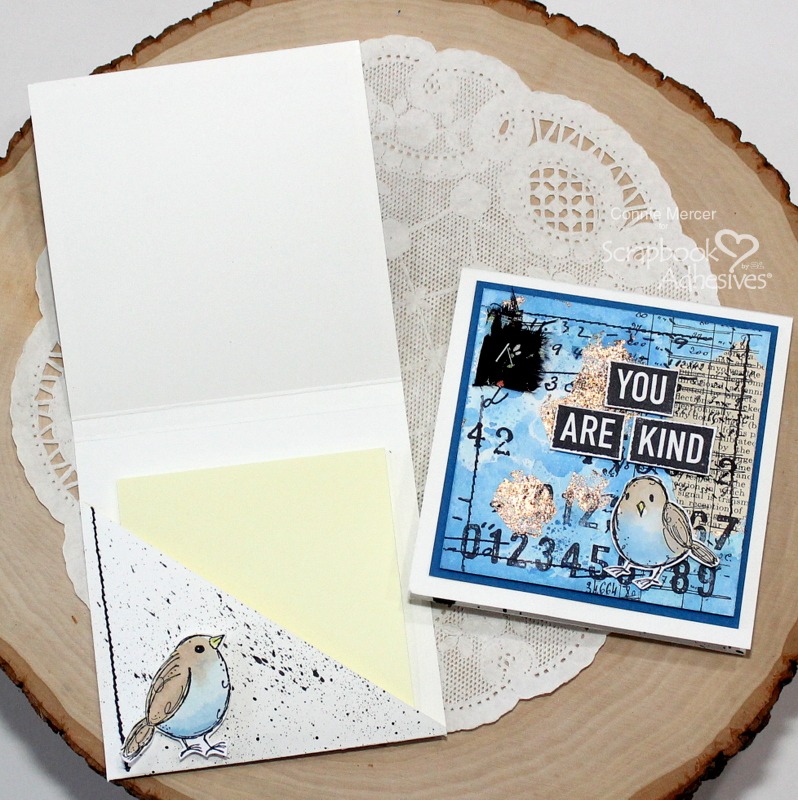
Mixed Media Memo Pads with Scrapbook Adhesives by 3L

 Hi all!
This is the third project using the products by 
Scrapbook Adhesives by 3L to create mixed media
covers, for memo pads, over on the BLOG
I'm using Adhesive Sheets 4x6, E-Z Runner Grand Repositionable
Refillable Dispenser
and Metallic Foil Transfer Sheets/
Nature 


These are really fun to make and make a great gift.
As always I have all the details over on the
Scrapbook Adhesives by 3L Blog with great step
out photos.


Here is a photo of all the projects together. All made with the same
background technique using "wear your adhesive on the outside".


Thanks for stopping by!
Connie/DT Member

Creative Time: 60 minutes
Skill Level: Intermediate

Materials Needed:
Scrapbook Adhesives by 3L®
Crafty Foam Tape 108′
Adhesive Sheets 4×6
3D Foam Squares White Mix
3D Foam Strips
Metallic Transfer Foil/Nature
E-Z Runner Grand Refillable Dispenser
HomeHobby by 3L
Dual Tip Glue Pen
Extreme Double-Sided Tape 1/4″

other: Post-It-Note pads, Stamps: Darkroom Door, Ink: Ranger

Pin It!


Thursday, March 3, 2022

Post-It Notes Flip Folders with Scrapbook Adhesives by 3L~

Hi guys!
I have a fun project for you along that has to do with Post-It Notes
 and with some tips that can make your 3D Foam Circles White Mix
 go further.  All of this over on the Scrapbook Adhesives by 3L Blog. 


I want to share the tips here and then you can hop over to Scrapbook
Adhesives by 3L Blog
 for the tutorial on how to create these flip open
note pads.
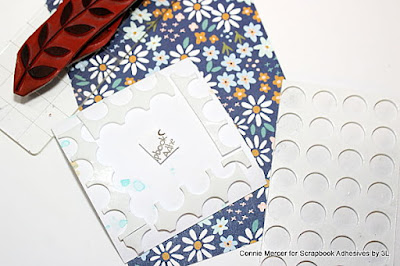
The tips are using this product 


Tip#1 ~ The release sheet (from the 3D Foam Adhesives) make great 
paint or ink throw away pallet.


Tip#2~  The top release sheet can be used as a small
circle stencil.


Tip#3~ The negative from the 3D Foam adhesive sheet can still
be used for dimensional adhesive.

I have all the details over on the Scrapbook Adhesives by 3L Blog.
Hope you will take a look.

Thanks for stopping by~
Connie/DT Member


Creative Time: 60 minutes
Skill Level: Beginner

Materials needed:
Scrapbook Adhesives by 3L®
3D Foam Circles White Mix
3D Foam Strips Black
E-Z Runner Grand Refillable Dispenser
E-Z Runner Grand Permanent Strips Refill

HomeHobby Adhesives by 3L
Premium Double Sided Tape 1″

other: Paper: Simple Stories/Safe Travels, Stamps: Darkroom Door, Ink: Ranger/Distress Oxide Ink, Post-It Notes, Stickers: Tim Holtz

Pin It!!


Wednesday, December 5, 2018

Easy and Quick Gifts~

Hi guys!!
A quick Christmas gift post.  These are perfect for girl friends and
 all other friends:)  I had a little buddy help with this project.
  He is really good too~

He is always eager to help me with assembly work~ 
Our projects were making coater clip type notebooks and the long notebooks
 for the ladies, at the facility, my mom is at.

These are coasters covered in pretty Christmas paper with a post-a-note pad attached.
It is all held together with a decorated cloths pin.  

Add twine and some rhinestones for a festive look.  I packaged them in clear bags.

Another easy project! These require the legal size note pads to be cut in thirds. 
 Most of the time the office store will have the cutter to that.  
You will be charged a small fee.  Not bad at all and they are really cute decorated!!

Cover the back of the notepad with pattern paper.  Use strong adhesive either
 tape or wet glue.  Cut a flap to go over the top.  Decorate using stickers or stamps.

All packaged up to send !! They don't take long at all 
especially when you have a cute helper.
*****************
Products used:
Christmas paper from stash
Joy Clair /You and Me Sentiments  (affiliate link) *** on sale ***
X-Press it adhesive tape
Ranger Archival ink/Jet Black
coasters
cloths pins
stickers
legal size note pads (cut in thirds)
twine and embellishments
*****************
Thanks for stopping by~

Tuesday, May 29, 2018

Try It Tuesday~bringing back an oldie but goody!

Hi guys!!
I brought back an oldie but goody for 
Try It Tuesday.
We did these coaster note pads with the girls youth group at church.
They really enjoyed creating them.
They had an opportunity to use stamps and make a fun project too.

These are easy to make and really are useful and I love that!!!
Who doesn't love something cute sitting on their desk~

Cover the coaster with pattern paper.  The size is a 4" x 4".  Cover the clip with a 2" x 1" 
piece of pattern paper. Add trim to the clip. Stamp a sentiment for the
 bottom, under the post -it note pad and adhere.  That is pretty much it~ easy!!!


Supply list:
Pattern Paper: stash :)
Glue: any glue stick or wet glue will work
Stamp:  from my stash ( use what you like)
clip: from office supply store
trim: stash :)
Post-it notes: office supply store
Great Summer project to do with the kids.  Teacher gifts, 
Christmas presents already made
for those special events~ that is a win win!!!!


Thanks for stopping by~
cm

Thursday, October 15, 2015

Creating Made Easy Kit~October third project

Hi, Connie here sharing my third and last project using the Creating Made Easy Kit for October.  The kit has the cutest little mini mixable album.  Thinking outside the box, I came up with this.  Super cute idea for a teacher gift or yourself:)

Oct3

All you need is the mini album and a Post-It-Note pad.  I attached them together with twine, you could use rings also.  Just cover with paper from the kit and embellish.  Adorable project!

Oct3b

Thanks for stopping by~
Connie Mercer/Guest Designer