Showing posts with label re-purposed. Show all posts

Tuesday, June 10, 2025

Quick and Easy Sentiment Strips ~ re-purposed!

Hi there!
Today I'm sharing a re-purposed idea. 
I don't like to throw pieces of left over paper in
the trash.  I want to find a use for it or
at least try :):)


Some 12x12 pattern paper packs come with a salvage edge on the top and 
by turning it over you get a white strip (that is perfect size) to stamp
a sentiment on.  The time it saved was a game changer for me. 


Snip off the sentiment from the strip, add adhesive and
adhere to your project. Easy!!!!
 

I was making Corner Bible Markers for Vacation Bible School.


I used stamps by Creative Worship, Blue Knight and
adhesive by Scrapbook Adhesive by 3L/3D Foam Strips.  The paper
is by s.e.i.
Thanks for stopping by!!!
Connie
crafty_mercer

Thursday, October 3, 2024

A Re-Purposed Lamp Shade~

Hi there!
Today I'm sharing a re-purposed (bare) lamp
shade.  I had the idea to use it as a display piece
for my mixed media tags. (I have another post with this lamp shade)
 Original Post HERE.


I lifted the lamp shade up by positioning it on the top of a large
wooden spool.  For now that is the way to will stay but I might need
something taller if I have more tags to add and start using the bottom
of the shade.


I used some clips, from my stash, but I do think a paper clip would work also.
My tags are chunky so they hung all wonky but I like the look.:):)


Before I added the tags to the lamp shade, I kept them on a large
"o" ring (and that worked great too).  I like this because I can see them better.

Thanks for stopping by!
Connie
crafty_mercer
Facebook page: Crafty Goodies

Friday, December 3, 2021

Vintage Merchant Gift Tags with Scrapbook Adhesives by 3L~

Hi guys!
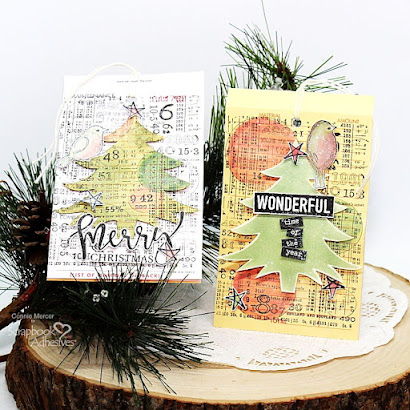
Today I'm sharing a fun project repurposing Merchant/Repair Tags
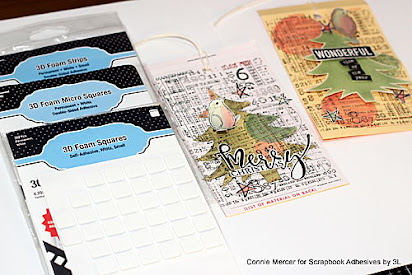
over on the Scrapbook Adhesives by 3L Blog.  I'm showcasing
their 3D Foam Adhesives. Perfect for this project!


The tags are 3 ply so you could use the inside, of the tags, for a
hand written note or stamp a sentiment.  The paper is thin so having
3 ply works great.  They make really fun Christmas Gift Tags.


These are the tags I created with. I used the front  and the back
of the tags to decorate. 


I have all the details on the Scrapbook Adhesives by 3L Blog.  I 
hope you will check it out.  Keep in mind any type of
ephemera that could be made into a tag would work and look
great!!!


Thanks for stopping by and I hope you enjoy this project using vintage ephemera. 
Connie/DT

Creative Time: 40 Minutes
Skill Level: Beginner

Materials Needed
Scrapbook Adhesives by 3L®
3D Foam Squares White Regular
3D Foam Squares White Small
3D Foam Squares Micro White
3D Foam Strips

Other: vintage ephemera, Ink: Distress Oxide and Archival, Stamps: Darkroom Door and Crafty Individuals, Stencils: Darkroom Door, twine.

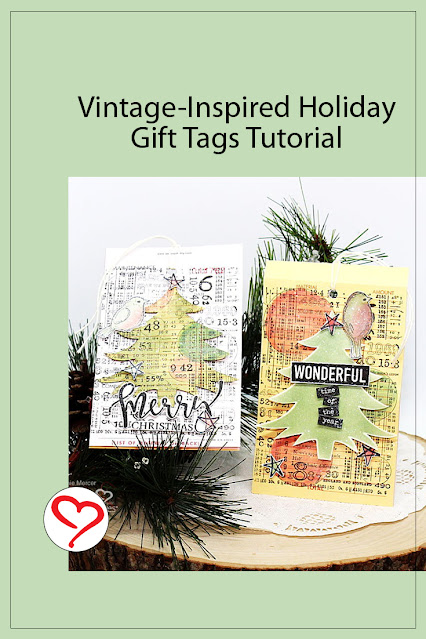
 PIN IT!!!

Friday, July 3, 2020

Art Hangers with Scrapbook Adhesives by 3L~

Hi guys!
It is my turn on the Scrapbook Adhesives by 3L Blog.
I have re-purposed project to share using vintage cloths
hangers.  I used the Crafty Power Tape to secure the vintage
photos to the front of the hangers.  The photo was an 8 X 10 mat
black n' white cut in 1" strips used for the background on the
 ART hangers.
There is a step by step tutorial on the Scrapbook Adhesives by 3L Blog.
I hope you will take a look and make some.  The hangers are from a
resale shop but I have seen them online and in retail stores.  The vintage
photos were given to me but I have seen stacks of them at resale shops
reasonably priced.  Pattern paper would look awesome too!


Here is another look with ART attached to the ART hanger~
Keep in mind anything that can be attached to the hanger would make
an unique display piece.

Thanks for stopping by and I hope you go junkin’ soon.
Connie Mercer
Creative Time: 60 Minutes
Skill Level: Intermediate
Materials Needed
Scrapbook Adhesives by 3L®

Crafty Power Tape
3D Circle White Mix
Creative Photo Corners Black
Home Hobby by 3L®
Dual Tip Glue Pen
Other
Vintage photos (8″x 10″) black / white mat finish, paper dolls by Tim Holtz, vintage hangers, Distress ink/Jet black, chipboard words by Tim Holtz
Pin It!!!


Tuesday, June 2, 2020

Try It Tuesday ~ my space

Hi guys!
I thought i would share a few pictures of my space I
create in.  I'm blessed to have a room just for creating so
what that means I can start a project and leave it out
until it is completed.  Nothing is messed with!!!
This is an overview from inside the room.  I have three tables clustered
together.  One is for inking and stamping. Two is for painting and three is
cutting and my die cut machine.
This is where I stamp. I stand when I create so this set up
 works well for me.
The back cabinets hold more stamps and office supplies.  The counter is
full of stamps and stencils that I use frequently.  I love to see what I have
to create with!  With that said it does make the room look cluttered but
"it is what it is".  All of like items are stored together.  Paper, adhesive,
stamps, stencils and ink have their own space.   I organize by manufacture.
 

This is the view when I walk into the room.  The carts are loaded with
die cut dies and more inks, sprays and watercolors.  I keep small
embellishments in the vintage canning jars.  I really love the look!
I also use cigar boxes for storage of clips and ribbon.  I love using
 old things from the past for storage.  That way they can hang out with me.
Just sharing some ideas of how I keep organized, or at least I'm thinking
I'm organized.  

 
Thanks for stopping by for


cm


Wednesday, May 27, 2020

Six ideas for re-purposing vintage finds~

Hi guys!!
I took a walk on my front porch and thought I would
share some of my re-purposed finds.  You know the
grungy stuff no wants to take home.  I love chipped paint, rust
 and eclectic finds!!

no.1
This is an old carpenters tool box. When I found it the bottom
was coming off.  It is still the original paint.   I thought one
of the bird nests (collected this Spring, with fake eggs) made for a cool table
center piece.  Always can find something to put a bird nest
in.
no.2
Old chippy chairs make a great plant stand.  Dug these out of a trash pile.
no.3
A chippy chair, holding a vintage washboard, make for a super cute 
deer antler display for the front porch.
no.4
Old pottery and large enamel ware pots are great for collecting
natures gifts.  These have pine cones of all sizes, from all over
the USA.
no.5 
Old milk can with a slice of tree (from ranch) make a unique
table.

no.6
A hunk of wood and an unique tractor seat (needs a new paint job) makes a 
very cool ranch stool for the BBQ pit!!
Thanks for stopping by and let me know in your comments
if you would like to see more of this type of blog posts.
I would love to hear from you~
Connie

Tuesday, August 28, 2018

Try It Tuesday~tart tins and dishes!

Hi guys!!
Thanks for stopping by for Try It Tuesday.  I haven't been regular on Tuesday
 and I'm sorry for that.  Life has been coming at me pretty fast lately.  I have a cute project to share using some junkin' stuff.  If you have tart tins and old dishes your good to go. Let me show you~

All I did was glue the tart tin to the bottom of the dish, making a dish with a pedestal.
I used Beacon Quick Grip, love this stuff!!!

 Let them dry for about 10 minutes and it is good to go.  You could also use saucers for this (just didn't have any).  The rule is "use what you have".  If you have to buy stuff, just takes the fun out of re-purposing something. 


These also would be really different to hold a birthday cupcake for someone special. 
I'm using them, in a cluster, for buttons.

Hope you will make some ~
tag me if you do :)


Tuesday, October 3, 2017

Try It Tuesday~ a makeover, as in EPIC!!!

Hi guys!
I have a FUN project, one you are going say "really"~
It is quite the makeover.

Looks like brand new right, well it didn't always look like this~
This is a makeover of a vintage 1950's coca~cola ice chest my son
 came across and gifted to me.  Lucky girl :)
Here is a picture along side the original before any work was done on it~

First step in the makeover was to STOP the RUST.
Hubby sprayed a "rust killer" (Ospho) on it and let it sit for a day.  He sanded it ever so slightly.

Then it was spray painted with red.  Let it dry really good ~ now it was my turn to work on it.

I used a #2 paint brush and painted the Coca~Cola on first. I used white acrylic paint by DecoArt.  It took 2 coats to cover and make the letters smooth.

Finished the first side and then painted the words on the backside.  It took me a couple of hours to get the words back on.  The words were sealed with a clear coat spray.

I still want to put moss around the edge of the plastic (holding the succulents) ~
just got to get to town to get some.

Succulents came from Montana. 

Thanks for stopping by for 
My son wants it back!!!

Tuesday, May 9, 2017

Try It Tuesday~ a couple shelf sitters!

Hi guys!!
I have a fun re-purposed project to share. It is pretty easy too!!!
 I took Star Tart/Jello Tins and created  shelf sitters ~

Aren't these sweet.  I have never seen the Star type tart/jello tins before. 
I have had sea shells and buttons on the brain lately, so that is where I started.
I also had the super cute Paper Dolls by Tim Holtz, so I used them too :)

I filled the tins with small sea shells and small buttons.  I stuck the paper
 doll people down in the sea shell/button  mix.  Added a cute tag and call them "shelf sitters".
The paper dolls are made of a heavy paper which made it easy to stick in the mix of sea shells/buttons.  The "sister " shelf sitter really reminds me of two little "Hyde" girls.
 (Isn't my sister's bow pretty) 
Just having fun creating!! Just remember it doesn't 
have to be hard to make to be cute and fun!!
Thanks for stopping by for 

Monday, February 13, 2017

Heart Tart Tin Flowers~

Hi guys!
I have been creating with those heart tart tins again. I used felt this
 time instead of paper.  The background is paper and the rest, of the inside, is felt. 
I'm not going to hold my breath, but if I got some Roses these would look really pretty
 nestled among the them.

The shapes are steel dies and the leaves are hand cut.  The straws were an added touch.
  These would be darling tied to a homemade loaf of bread (any kind).  So romantic :) :):)

These were fun to make and I hope you have beautiful Valentine's Day!!
See ya soon~

Tuesday, December 8, 2015

Try It Tuesday~vintage milk caps and snowmen!

Hi guys!
I have a BUNCH of vintage milk caps and I thought "let's make a snowman".
So I did~

I used products by A Jillian Vance Design and Darkroom Door.  I used hot glue to build the body of the snowman. Then added a felt hat and ribbon.  I'm going to use these on some special Christmas gifts.


And they were made using the vintage milk caps~
Linked at : Vintage Inspiration Party
My Salvaged Treasures
See ya soon~