Tuesday, December 31, 2019

Seasons Givings Blog Hop 2020 ~

Hi guys!!
I'm so happy to be participating in this blog hop that is for the
soul purpose of thanking YOU the people that visit our blogs!
A little background on the Seasons Givings Blog Hop ~ this is the
 8th year for this wonderful event hosted by Latisha Yoast.
********WINNER********
I'm following your blog. You only need 3 more to hit 500. You go girl. I'm looking to make more shakers. Some easy method that I can understand. I also, like your candy bar wrappers. So, I'm interested to different projects other than cards but cards are my first love. Thank you. Go Cowboys!  

Giveaway Details!


To enter:
  • Follow my Blog  (I would love to have 500 followers) OR
  • Follow me on Instagram  ~ crafty_mercer  (do both make 2 comments for 2 entries)
  • Comment and tell me how you are following.  Make sure I can contact you. Tell me what kind of projects you are interested in creating and viewing.
Contest ends on Mon, 1/7/20 at 11:59 pm CST. Winner will be announced on Tue, 1/8/20.
USA only.
 Thanks for understanding! 
 
Blog Hop List~

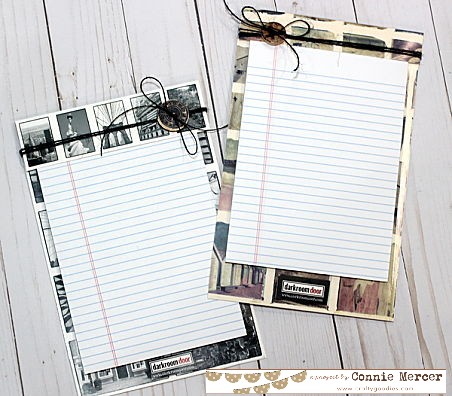
Here is a few of my favorite projects that were created in 2019~


Thank you for stopping by and
enjoy the Seasons Givings Blog Hop because
it is for YOU!!

Monday, December 30, 2019

Top 10 projects of 2019~

Hi guys!
Lets count them down the top 10 projects of 2019~
lets go.......
no. 1
Art journal page with Clear Scraps~my favorite art journal page,
 the colors, stencils it just all came together:)
no.2
Loved how this card evolved. Using stamps and a stencil by Darkroom Door.
no.3
These small church cards using Joy Clair stamps and stencils by
ARTplorations/Helen G. ~ the perfect mix of mixed media.

no.4
This was a fun time with buddy~creating super hero paper figures.
Using Paper House Productions products.

no. 5
Love everything about this card~ created using Blue Knight Rubber Stamps.I even asked myself, "did you really create that"?

no.6

My first project for Scrapbook Adhesives by 3L. Loved the background and the
 great adhesives:)

no.7
I had a dream about this design~loved how they came together.
Using stamps and stencils by Darkroom Door.
no.8
Using stencils from Clear Scraps, Stencil 1, The Creative Workshop 
and Darkroom Door. Fun project! 

no.9
Art journal page using stamps by Joy Clair ~ loved the blue green
color tones together.

no.10
Created with Blue Knight Rubber Stamps and a stencil by Darkroom Door.
*******************
January 1st Crafty Goodies will be in a Blog Hop that is all about
thanking our blog visitors (that is YOU). Every blog you visit will have a give away
and chances to win prizes.
 I hope you stop by on January 1, 2020 for the
Seasons Givings Blog Hop.

See ya soon~
cm

Friday, December 20, 2019

Montage Sheets by Darkroom Door ~


Hi guys!
I dreamed this up the other and  was eager to see if
it was a good design.  I took the Montage sheets by Darkroom Door 
and used them to cover a notepad. Let me show you~

I took some step out photos to explain the process~

 Supplies: Montage sheets by Darkroom Door,  Extreme Double Sided Tape by
 Scrapbook Adhesives by 3L and twine.

Instructions:
1. Size the Montage sheets ~ 8 1/4" L x 5 3/4" W.  The Topper will be 2" scored
down the middle.
2.  You will need two Montage sheets sized and taped together. 
Slip the notepad in the pocket that was created when the three sides
were taped together.
3. Adhere the Topper (that covers up the top of the notepad).
4. Add twine and embellish. 


Side note on the Montage sheets~ I checked the Darkroom Door website and
they are no longer listed in the product section.  If you are interested let me know
and I will see if I can get some.

Have a GREAT CHRISTMAS!!!

Thursday, December 19, 2019

A Silhouette Christmas card with Joy Clair!

Hi guys!
It is my turn on the Joy Clair blog.  I will be sharing a
card created using the Santa's Coming set by Joy Clair.  
It has some really fun silhouette houses that are amazing!!
I used my Misti (stamp platform) to get the houses lined up straight and then stamped them out on gray cardstock.  I used Versa Fine Clair by Imagine Crafts.  I love the deep, rich black color it produces.  On a silhouette type stamp the ink is important. You want good coverage of color.  The wreath was colored in with dual tip markers by Leisure Arts.  This card could be backed with different colors of cardstock (like traditional holiday colors) and look amazing.  I used silver cardstock with the gray.  Love the look!!
The house were splattered with white acrylic paint.  I use an old toothbrush and watered down paint to get a good snow look.   The card is adhered together with 3D foam squares by Scrapbook Adhesives by 3L.
Thanks for stopping by and have a wonderful holiday!!!

Christmas cards with Scrapbook Adhesives by 3L~

Hi guys!
It is my turn on the Scrapbook Adhesives by 3L blog today.
I have created two cards using Christmas Magic by Doodlebug Design and
some super strong adhesives by Scrapbook Adhesives by 3L 
All of the details are on the Scrapbook Adhesives by 3L Blog along with
step out photos and tips on making these fun cards.
Supplies used:
Scrapbook Adhesives by 3L: EZ Runner Grand/Permanent,  
 EZ Runner Grand/Ultra Strong3D Foam Squares Mix 
and 3D Foam CircleMix.
Other: Christmas Magic by Doodlebug Design,  glitter pen,
border punch, cardstock and twine

The surprise is the cards hold a pocket for a hot cocoa mix or 
gift card !
Pin It!

Thanks for stopping by and have a
wonderful holiday!!!!
Merry Christmas!!!!

Wednesday, December 18, 2019

Canvas Bags~mixed media style!

Hi guys!
I made these for two special friends of my moms~
I hope they love them.  I had such a great time creating them.
I used  a bunch of different stencils from my stash!
The Gel Press was used with DecoArt paint to create the background
for the bag.   The stencils were applied with paint and a small sponge.

After the paint dried the iron was used to heat set the paint.

Supplies used:
DecoArt paint
Gel Press
Stencils: Darkroom Door, Clear Scraps, The Crafter's Workshop, 
Stencil 1 and Dylusions/Ranger.
Canvas bags were bought on Amazon.
Other: buttons, antique trim

Thanks for stopping by~
Merry Christmas to all!! 

Monday, December 16, 2019

Bear Ornaments spruced up~

Hi guys!!
Another quick and easy, plus fun crafty post!
I took store bought ornaments and made a greeting tag 
for them.  I used the label stickers by Tim Holtz and
sentiments stamp by Darkroom Door.
These came 6 in a pack from HL.  I just added a sentiment tag stamped on
the Tim Holtz label stickers.  Punched a small hole to add twine.
I added these to gift bags I made for my moms friends.
Just some quick and easy little gifts!!
Thanks for stopping by
 AND
MERRY CHRISTMAS!!!

Wednesday, December 11, 2019

Crafting ~ yep!

Hi guys!!
I have been crafting and making small gifts for my 
mom to give to friends.  I started with this mess~
 Just pulled out a bunch of pretties and began putting them together
to create a festive pin.   I ended up making about seven or eight pins!!
So fun and so fun to be crafting again~


This is just cute stuff I grab when I find it at good prices.  The birds
are so cool. Wish I had grabbed more~


Love this green color~

I used buttons, paper flowers ~ tons of old embellishments
 but still so pretty!!
Hope you enjoyed this post ~ hoping moms friend love them
 and wear them!!

Merry Christmas!!!
Have a great day and happy holidays!!!!

Friday, December 6, 2019

3D Christmas Poinsettia Card with Joy Clair~

Hi guys!!
It is my turn on the Joy Clair Blog today!!
I'm sharing a card I created using the 3D Christmas Poinsettia stamp
set by Joy Clair I really love the 3D effect.  Tons of dimension!
The background, for the card, is Distress Oxides watered down and dabbed on the cardstock.  I dry the ink after each color is added.  It is really fun to layer the colors to get the exact look you like. I added stencils and modeling paste for more interest and dimension. The flower petals were stamped on white cardstock, colored and then trimmed out.  The Poinsettia flower was put together with a small brad and adhered to the card front with strong adhesive.  The card is outlined using a white gel pen.  The tag is created and attached to the card front using dimensional adhesive.

The Poinsettia flower petals are coated with a glitter pen (not showing in the picture).   The berries are acrylic red paint, applied with the small end of the stylus.  Works great and no mess!!  These 3D Poinsettia flowers are really fun to make and look gorgeous on projects!

Supplies used:
stamps: Joy Clair/ 3D Christmas Poinsettia
stencils: ARTplorations/stencils by Helen G.
paper: cardstock
adhesive: Scrapbook Adhesives by 3L
ink: Distress Oxide, Versa FAine Clair/Nocturne
modeling paste: Faber Castell
twine, white gel pen

Thanks for stopping by~

Tuesday, December 3, 2019

Christmas notepads with Scrapbook Adhesives by 3L and Doodlebug Design~

Hi guys!
It is my turn on the Scrapbook Adhesives by 3L Blog.  
I have made this type of notepads before and really love to
 create especially when I have some cute Christmas paper.
I'm using Christmas Magic by Doodlebug. So cute!!

All the details are on the Scrapbook Adhesives by 3L Blog
with some step by step photos.
These are really fun to create and great gifts for teachers
and favorite friends! 

Supplies used:
 Scrapbook Adhesives by 3L E-ZRunner Grand/Ultra Permanent and 3D Foam Circles
Other:
Doodlebug design, Inc./Christmas Magic, notepads, twine and embellishments

Pin it!!!

Thanks for stopping by~