Showing posts with label twine. Show all posts

Tuesday, August 6, 2024

Fall Harvest Pin with Buttons Galore & More~

Hi there!!!
I have been creating with the Harvest Monthly Subscription
Box by Buttons Galore & More
.  Love the assortment of fall 
colors represented in the Harvest kit. (affiliate link)
Rich beautiful colors!!


The monthly box is full of Flatbackz, Sprinkletz, Sequinz, Novelty
Buttons
and a Button Mason Jar.  Plus you get
 Sunflower Novelty Buttons and an Assorted Fall Embellishments 
in a keepsake container.  Such a fun kit!!


I created a twisted muslin broch by adding vintage trims and findings
along with the buttons from the Harvest Kit.  I added Flatbackz to a
stick pin and then pushed them in the center cluster. Twine was added 
along with stitching to the buttons.


I speckled with black acrylic paint for a distress look.  This looks great
on a denim jacket. 
Remember to get 10% off your button order by 
using CONNIE10 when you check out!! 
 

Thanks for stopping by!!!!
Connie
crafty_mercer
Facebook page: Crafty Goodies

Tuesday, July 19, 2022

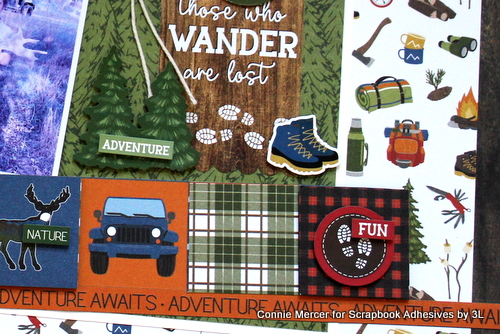
Scrapbooking with Scrapbook Adhesives by 3L~ Ranch Life!

Hi guys!
Today I'm sharing a scrapbook page using a
paper collection by PhotoPlay called The Great Outdoors
over on the Scrapbook Adhesives by 3L Blog.  Using the
E-Z Runner Grand Repositionable Dots Refillable Dispenser
really helped getting the bottom border where it needed to be. 
It took a coupe of times to get it right.


As always I have a tutorial with step out photos on the Scrapbook
Adhesives by 3L Blog. I hope you will take a look.


The border up close with added stickers and word stickers.
I used 3D Foam Squares White Mix for this. 


The letters for the title are adhered with the Dual Tip Glue Pen
 by HomeHobby by 3L.

Thanks for stopping by!!!
Connie/DT Member

Skill Level: Beginner
Creative Time: 50 minutes

Materials Needed:
Scrapbook Adhesives by 3L®

E-Z Runner Grand Repositionable Dots Refillable Dispenser
E-Z Runner Grand Refillable Dispenser
3D Foam Strips
3D Foam Squares White Mix
Home Hobby by 3L®
Dual Tip Glue Pen

other: paper: PhotoPlay: The Great Outdoors, twine and stickers.


Pin It!!


Friday, November 19, 2021

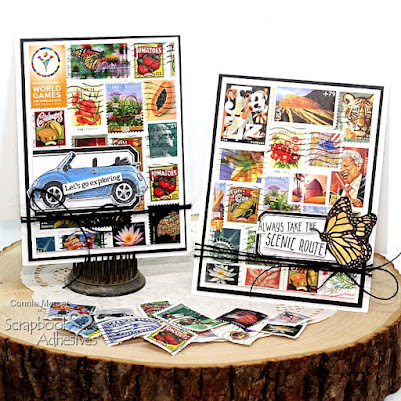
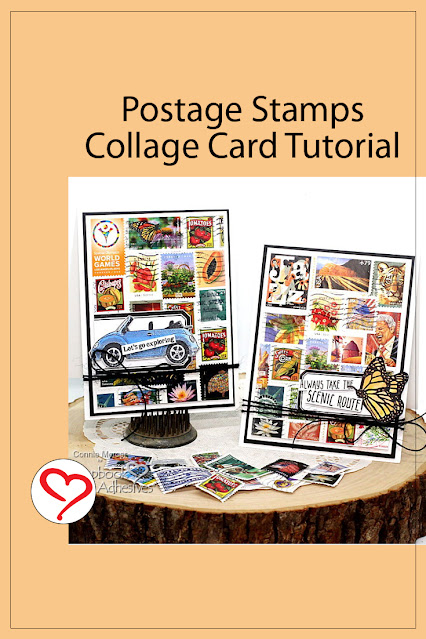
Postage Stamps Collage Cards with Scrapbook Adhesives by 3L

Hi guys!
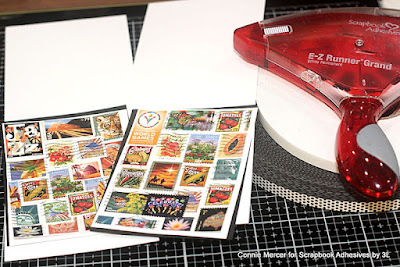
It is my turn on the Scrapbook Adhesives by 3L Blog. I created
a couple of cards using the Dual Tip Glue Pen as the collage
medium to adhere old postage stamps to a card front.


As always I have all the details and more photos
on the Scrapbook Adhesives by 3L Blog. I hope you will take a look.
If you love a little messy, as in fingers, check this project out.


Connie Mercer/DT Member


Creative Time: 50 Minutes
Skill Level: Beginner

Materials Needed:
Scrapbook Adhesives by 3L®

E-Z Runner® Grand Refillable Dispenser
Crafty Foam Tape White 108ft.
Crafty Foam Tape Black 108ft.
3D Foam Strips

Home Hobby by 3L®
Dual Tip Glue Pen

other: Whimsy Stamps, Blue Knight Rubber Stamps and Darkroom Door Stamps, twine and old postage stamps.

Save to Pinterest!!


Sunday, October 3, 2021

Travel Tags with Scrapbook Adhesive by 3L

 Hi guys!
Today I'm creating Travel Tags using Safe Travels by Simple Stories
and Creative Photo Corners White by Scrapbook Adhesive by 3L.  I 
have all the details on the Scrapbook Adhesives by 3L Blog.
I hope you will take a look~


The Safe Travels collection is really cute!  I plan on using
these tags on scrapbook pages.  Here is a peek at the 
Creative Photo Corners White border!!!


Thanks for stopping by.
Connie

Creative Time: 45 Minutes
Skill Level: Beginner

Materials Needed
Scrapbook Adhesives by 3L®

E-Z Runner Grand Refillable Dispenser
E-Z Runner Grand Permanent Strips Refill
Creative Photo Corners White
3D Foam Strips
3D Crafty Foam Tape 108′
3D Foam Squares White Mix

other: twine and tag reinforcers

Pin It!!!


Saturday, October 3, 2020

Card Kit by Photo Play Paper with Scrapbook Adhesives by 3L~

Hi guys!
It is my turn on the Scrapbook Adhesives by 3L Blog today!!
I always love it when it is my turn~
Today I have a collections cards that were created from a card
kit by Photo Play.  It is a themed kit for Birthdays called Confetti.
It comes with the supplies to create 8 cards!!! Wow!!!
Sure makes it easy to put them together with the great adhesives
by Scrapbook Adhesives by 3L. 
I have a tutorial over on the Scrapbook Adhesives by 3L Blog 
and it shows the different kinds of adhesive I used for different 
die cuts and embellishments.
 
Hope you enjoyed these Confetti Birthday cards and inspire you to break
 open a card kit!
Thanks for stopping by~
Connie

Creative Time: 30 Minutes
Skill Level: Beginner
HomeHobby by 3L®
Dual Tip Glue Pen
Other: Card Kit: Photo Play Paper (Confetti Card Kit); Twine
Pin It!!

Monday, March 16, 2020

Abstract 08 by Darkroom Door~

Hi guys!
I have a couple of cards to share using the newly
released stamp called Abstract 08 by Darkroom Door.This is a fun stamp and goes so well with the other abstract
 stamps 
in the Darkroom Door product line.

These are created on the #10 size manila tag by Ranger.  On both of these tags
 the background was created with Distress Oxide inks.  The bottle tag is stamped
with Number Medley set to give that aged and vintage look.  The succulent tag
 is stamped with the Abstract 08 stamp in random places creating a
background for the Succulent images to be clustered together.  On both
tags the focal images were stamped and then trimmed out. The images
were then adhered with dimensional adhesive to the tag front.

Friday, January 3, 2020

Coffee Mug Gift Card Holders with Scrapbook Adhesives by 3L~


Hi guys!
It is my turn on the Scrapbook Adhesives by 3L blog today.
I have created two Coffee Mug cards using Christmas Magic by 
Doodlebug Design and the 
  The mug cards are also gift card holders!
  Perfect for the coffee lover~


All the details are on the Scrapbook Adhesives by 3L Blog.
Supplies used:
Scrapbook Adhesives by 3L:  E-Z Runner Grand/white permanent, 3D Foam Squares/mix,
and Glue Pen/Dual Tip.
Other: Christmas Magic by Doodlebug Design, Trinity Stamps (die),  glitter pen,
white gel pen, cardstock and twine

PIN IT!!
Thanks for stopping by~

Friday, December 20, 2019

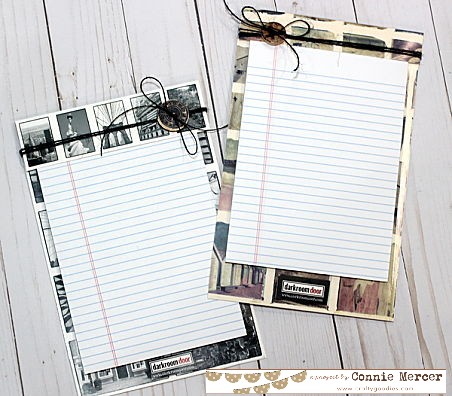
Montage Sheets by Darkroom Door ~


Hi guys!
I dreamed this up the other and  was eager to see if
it was a good design.  I took the Montage sheets by Darkroom Door 
and used them to cover a notepad. Let me show you~

I took some step out photos to explain the process~

 Supplies: Montage sheets by Darkroom Door,  Extreme Double Sided Tape by
 Scrapbook Adhesives by 3L and twine.

Instructions:
1. Size the Montage sheets ~ 8 1/4" L x 5 3/4" W.  The Topper will be 2" scored
down the middle.
2.  You will need two Montage sheets sized and taped together. 
Slip the notepad in the pocket that was created when the three sides
were taped together.
3. Adhere the Topper (that covers up the top of the notepad).
4. Add twine and embellish. 


Side note on the Montage sheets~ I checked the Darkroom Door website and
they are no longer listed in the product section.  If you are interested let me know
and I will see if I can get some.

Have a GREAT CHRISTMAS!!!

Wednesday, September 11, 2019

Med. Pallet Mason Jar by Clear Scraps~

Hi guys!!
My turn on the Clear Scraps Blog!!   Super fun project using the newly released Med. Mason Jar and All Create 4x6 stencil by Clear Scraps.   The Med. Mason jar is in the pallet family of shapes created by Clear Scraps.

Instructions:
1. Sand lightly and wipe off with a soft cloth.
2. Paint jar lid gray and body of jar a color of your choice.
3. Sand again for a distressed look.

4. Create a guide for the stencil so the spacing will be correct.
5. Move the stencil according to where the breaks in the pallet board are when you are applying the words (ink works best for words).
6. Stamp the paint brushes (Darkroom Door) out on watercolor paper and trim out.  Color the brushes in with watercolors or markers.

7. Adhere the paint brushes with Beacon 527 along with a few paper flowers.
8. Splat with white acrylic paint lightly.


9. Wrap the jar lid with twine and then tie on ribbon. Fold the ribbon in a figure eight pattern and then tie on.
10. Use crop-a-dile to make holes in top of mason jar for a hanger.
These are fun to create and what great gifts!!!

Thanks for stopping by~
Connie Mercer/DT Member

Wednesday, September 4, 2019

Gone Fishing with Clear Scraps!!

Hi guys!
It is my turn on the Clear Scraps blog.  I will be sharing how the newly
released  XL Wood Vintage Truck was created using stencils and paint.
Super fun project!!


Instructions:
1.  Sand the truck lightly with sand paper and wipe off with a soft cloth.
2. Paint the truck with acrylic paint of your choice.  Mark off the tires.
3. Paint the tires black and the hub caps gray or silver.
4. Paint the side bars brown.
5. Sand lightly and wipe off.
6. Create a fishing pole out of a yard stick.  Attach it to the side bar of the truck.
7. Apply the "gone fishing" stencil by Clear Scraps to the front of the truck.
8. I used Jet Black Archival ink. 

9. I used the 6"Beach Fun and 6"Ocean friends stencils to add the fish and hook to the "gone fishing" (I wanted it to look more like a logo on the side of a truck).
A few tips to keep in mind when creating this project~
Rubbing Alcohol will take off the acrylic paint in case of a goof up.  Remove the problem area and then touch up with more paint. I use cotton balls.
To get the tires round (without a stencil or guide) I use my pinky finger as a stabilizer (like a compass) to get the shape of the top circle.
To put the "gone fishing"on~first apply the "gone" above the rear tire and then apply "fishing" above the running board.
One more~I used ink with the stencils and not paint. You will get  really crisp words this way.

Thanks for stopping by~
Connie Mercer/DT Member

Saturday, April 6, 2019

A Whale card with Joy Clair!


Hi guys!
It is my turn on the Joy Clair Blog.  I will be showcasing the
"I think you're S'whale" set by Joy Clair


This is such a cute set and I love the play on words!!!  You will surely
 get some laughs on some of these sentiments.  Perfect for friends!

This card was created using Distress Oxide to get desired background.
I used several different blues and kept adding them until the ocean look
appeared.  The sand is two different brown tones from the
 Distress Oxide ink colors.  The sea moss was stamped out on white cardstock
and then cutout.  Sea shells were stamped in the sand.
 The sentiment and twine were added to the bottom of
the card. to complete the swimming in the ocean with a
smiling whale.
Such a fun set to create with!!!

Thanks for stopping by~


Monday, March 11, 2019

Anniversary Sentiment Stamps ~Bookmark!!

Hi guys!
I have a fun project using the Anniversary Sentiment stamps by Darkroom Door. 
I combined it with the Tag set and constructed a book mark.
 Let me show you~


Here is a chart on how the tag stamps was used and cut~

Basically your are lengthening the tag to the length of the Anniversary
 Sentiment Stamps.
Highlight the sentiments you want to use on the tag.
Supplies used:
Darkroom Door Anniversary Sentiment Stamps
Darkroom Door Stitched Borders Stamp Set
Darkroom Door Garden Birds Stamp Set
Darkroom Door Fun & Games Stamp Set
Darkroom Door Tags Stamp Set
Darkroom Door Large Mesh Stencil
Distress Oxide Ink: Peeled Paint
Archival Ink: Cobalt, Jet Black, Potting Soil and Red Geranium

Thursday, October 18, 2018

Ghost Necklace with Clear Scraps!

Hi, Connie here with a cute project using the small Ghost Pallet shape by Clear Scraps.   These small pallet shapes make fun and easy necklaces that children (and fun adults) will want to wear on Halloween night!!!


This is really an easy creative project.  Start by painting the ghost white.  Add the face with bright and different colors of paint.  I went with green for the eyes.  I used the spider web stencil, by Clear Scraps, and added it to the corner of the ghost pallet.  The chipboard bat is embossed and then adhered with a strong adhesive.  Next tie green twine around the ghost and add a orange button. Punch a hole in the top ( with the crop-a-dile) and add an "o" ring and then the chain.  Add a small piece of distressed fabric by the "o" ring.  Seal with a mat varnish and call it done and cute!!!

Ghost pallet shape2_Clear Scraps_c.mercer

Supply list:
Clear Scraps: Sm. Ghost Pallet, 6" Spider Web stencil and Chipboard Bat embellishments
Beacon Adhesive
Other:
Acrylic paint/DecoArt
Embossing powder/Emerald Creek
twine, fabric, button

Thanks for stopping by~
Connie Mercer/DT Member

Thursday, December 21, 2017

December Darkroom Door Challenge project~

Hi guys!!
The challenge for December's Darkroom Door facebook group is yellow.  Use yellow,
along with Darkroom Door stamps and or stencils, to create a project.
I created a set of cards using the NEW Succulents set.
I'm so hooked on this set. Love it!!!!

 Three different colors, of  Distressed Oxides, were used to create
 the background for the card.  The Succulent stamps were stamped, in random places,
on the card front.  Archival Ink by Ranger was used for this.

Twine and buttons were added along with the sentiment. 
Supplies used:
Darkroom Door: Succulents, Brushed Sentiments
Ink: Distressed Oxide and Archival ink by Ranger
Silk (ink splats) by FSJ
Other: Buttons Galore & More and twine.
**********************************************
Thanks for stopping by~


Tuesday, August 15, 2017

Try It Tuesday~ more button brooches!!

Hi guys!
I have been super busy with four grands.  We have gone to
 the movies, made slime :), toured the caverns, went to a snake farm, made ice cream shakes,
 enjoyed swimming and marble game tournament (every night).  They also walked
 with me every night ~ great talks too!!!
Just letting you know why I haven't been around :)  it is coming to and end soon :(
***********
I created these brooches out of vintage muslin cloth.  Twist the fabric and tack with hot glue or a strong wet glue.  Add felt to the back (to keep the brooch together).  The leaves are vintage, about 1950's.  I found them on a junkin' trip.  The buttons are from Buttons Galore and More.

My mom wanted this one !

Sent this one to a very special lady :)  
I kept the top one :)
Supply list:
Muslin fabric cut in strips 24" long about 4" wide
twine
Vintage leaves or flowers
Buttons Galore & More will have gorgeous buttons!
felt
strong adhesive

Thanks for stopping by for